Cell 2 Fire QGIS plugin
Table of contents
This repo contains a QGIS plugin for graphically interfacing with Cell2Fire SB simulator.
Choose your guide:
This softwares enables you to simulate thousand of forest fires on a landscape using QGIS. At least you’ll need a fuel and elevation layer.
Installation
- pip install python required packages
- move the source folder to QGIS’s plugins directory
- activate inside QGIS
Windows
- Install QGIS, using OSGeo4W net installer
- https://qgis.org/en/site/forusers/alldownloads.html#osgeo4w-installer
- Use default options for everything but
- Select packages to install “QGIS desktop” & “pip”
- At least open and close QGIS once
- Download & un7zip a release (from the right tab) into
fire2am(default suggested name) - Inside, double click on
installer_windows.bat- ‘More info’ on the warning dialog
- ‘Run anyway’
- Install the plugin inside QGIS
Linux
- Install QGIS
- Debian LTR version: Super Key > type ‘QGIS’ > Click Install
- Others: https://qgis.org/en/site/forusers/alldownloads.html#linux
- Donwload a release, unzip into the plugins folder
~/.local/share/QGIS/QGIS3/profiles/default/python/plugins/fire2am cdinto it- Python requirements
(Optional) A virtual environment can be used, but you must remember to activate it before launching QGIS, for example$ source ~/pyenv/qgis/bin/activate && qgispip install --upgrade pip wheel setuptools pip install -r requirements.txt - A Cell2Fire c++ simulator binary is provided, but is better to compile it
 cd C2FSB/Cell2FireC
 sudo apt install g++ libboost-all-dev libeigen3-dev
 make
If it fails check where your distribution installs eigen. Because the
makefileassumesEIGENDIR = /usr/include/eigen3/
Locate it withnice find / -readable -type d -name eigen3 2>/dev/null
Then editmakefileaccordingly & try again. - Enable the plugin inside QGIS
Activate
- QGIS Menu > Plugins > Manage and Install Plugins > All
- type ‘fire’, select ‘Fire Simulator Analytics Management’
- click ‘Install Plugin’
Now you have a new icon on the plugin toolbar and a new plugin menu.
Usage Overview
- Open & save a qgis project
- At least have a fuel raster layer in ascii AAIGrid format, according to Scott & Burgan fuels definition
- Set project & layers CRS
- Open the dialog, setup the layers, ignitions, weather on each tab. Click Run!
- Wait for the simulation & postprocessing.
- Main results will be added as a layer, the rest will be stored into outputs.gpkg
Screenshot
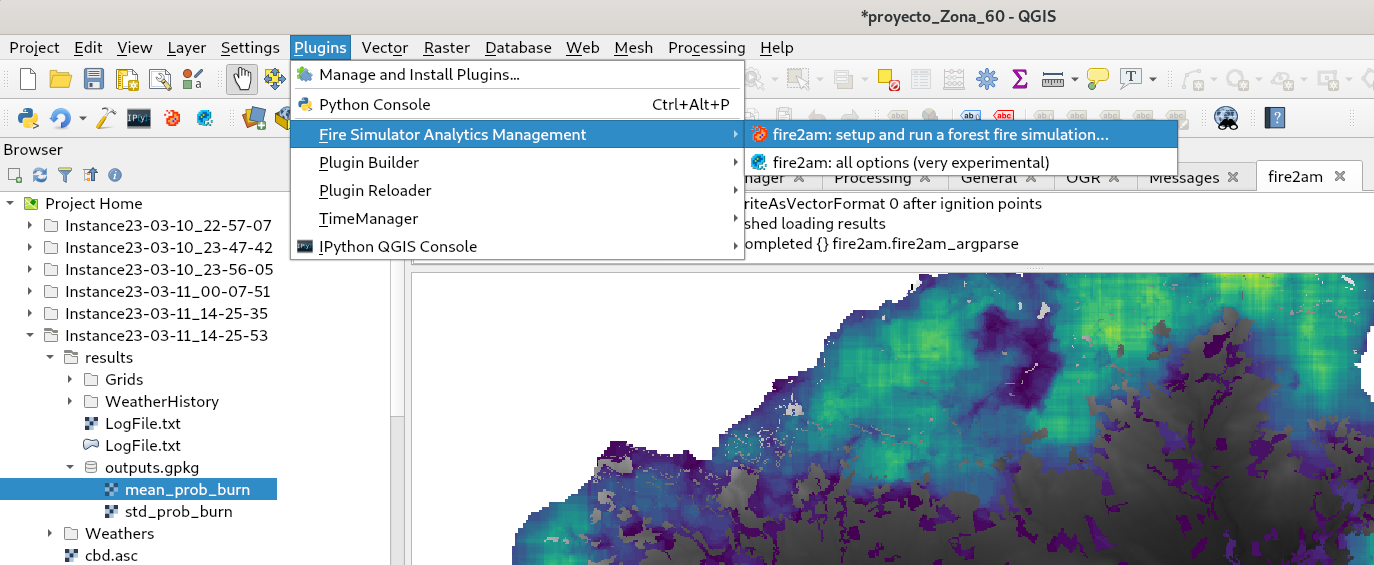
- On the Plugin Menu this plugin is shown selected
- Its icon is also available on the Plugin Toolbar

- Along other very useful plugins:
- Plugin Builder : For developers wanting a minimal working plugin template
- Plugin Reloader : If the provided Restore Defaults button doesn’t work, use this
- Time Manager : For earlier versions of QGIS (<3.2) this is needed for animating the fire isochrones (merged fire evolution layer)
- IPython QGIS Console : A introspection capable ipython session based on qtconsole
Known issues
- Directories or folders with spaces won’t work
- Don’t close the current project with the dialogs opened
- Don’t try opening the results directory while the simulation is running, specially -after the simulation- while postprocessing statistics